Video podcast equipment for your home studio.
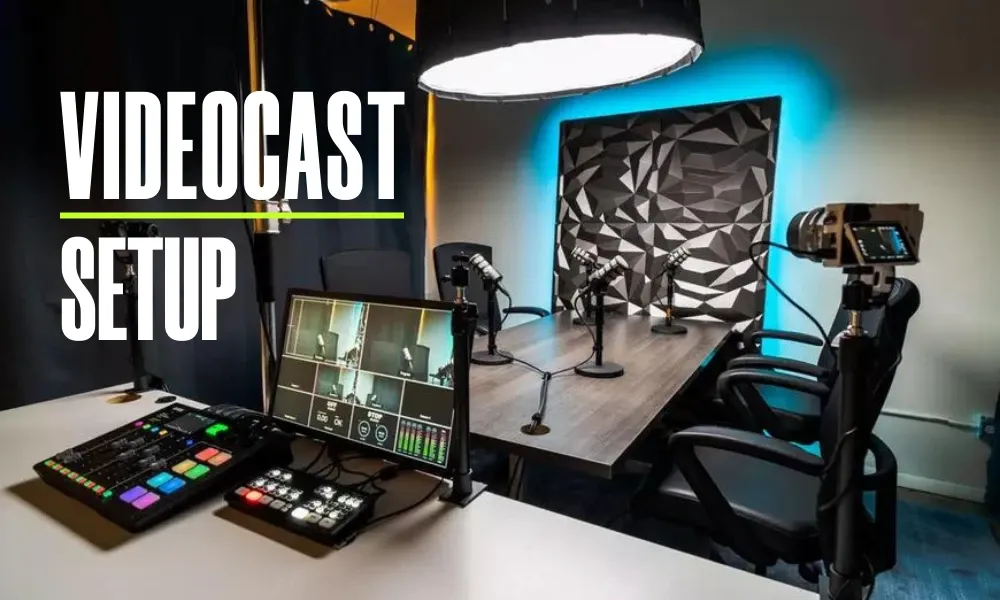
Camera, microphone and light compared, with three ready-made setups.
You start the recording, look at the preview and see yourself the way your clients have seen you in every video call for years. Slightly noisy, the window behind you, the camera looking up at your chin. For a Teams meeting that is enough. For a video podcast that runs on YouTube next to professionally produced shows, it is not.
The good news is that a good video podcast setup does not cost a fortune. What matters is that camera, microphone and light fit together. A good microphone does little for you if the picture looks like it was shot in a basement, and the best camera nothing if the audio echoes.
In this article you get the complete equipment for your video podcast in a home studio. Cameras, microphones, interfaces, light and software compared, with approximate prices and three ready-made setups for every budget.
Tip
This article is about the fixed setup for your home studio. If you want to record on the go and are looking for a small, affordable setup that fits in a backpack, read the article on the mobile video podcast setup with gimbal cameras and USB microphones.
What do you need for a video podcast?
For a video podcast you need a camera, a microphone, good light, headphones and software for recording and editing. If you use an XLR microphone, an audio interface is added. That is all, everything else is accessories you can add later.
- Camera, from webcam to mirrorless
- Microphone with boom arm, via USB or XLR
- Audio interface or podcast mixer, only for XLR microphones
- Light, at least one good light from the front
- Headphones so you hear yourself and your guests
- Software for recording and editing
By the way, the order in which you invest is not the one most people choose. Audio comes first, then light and only then the camera. Listeners forgive a mediocre picture far more readily than bad audio.
Which camera for your podcast?
For most podcasts in a home studio, a good 4K webcam is enough. If you want an image with a soft background and a real cinematic look, take a mirrorless camera with a large sensor. In between are compact cameras that pack a lot of image quality into a small body.
Webcams
Modern 4K webcams cannot be compared with the ones from a few years ago. They set exposure and color automatically, some even follow you with a small pan head. You plug them in via USB and you are done. The disadvantage is the small sensor: in low light the picture quickly gets flat and noisy.
Compact cameras
Compact cameras like the Sony ZV-1 II have a considerably larger sensor than any webcam and a permanently built-in lens. You get visibly more depth in the image without having to worry about lenses. For a home studio with one fixed angle, they are a good middle ground.
Mirrorless cameras
Mirrorless cameras like the Sony ZV-E10 II or the Canon EOS R50 V deliver the look you know from big YouTube podcasts. With a fast lens the background goes soft and you stand out clearly. Many newer models connect directly via USB as a webcam, the ZV-E10 II for example in 4K at 30 frames per second. With older cameras you need a capture card like the Elgato Cam Link 4K for about €90 to €130. Also make sure the camera can be powered continuously, otherwise the battery dies in the middle of the recording.
And the smartphone?
The camera in your phone is better than any laptop camera and often better than cheap webcams too. Current iPhones and many Android phones film in 4K. For starting out it is a real option, and how to use it on your computer I reveal in the bonus. And if you want movement in the picture, look at the gimbal cameras in the article on the mobile setup .
| Camera | Type | Video | Strengths | Price approx. |
|---|---|---|---|---|
| Elgato Facecam MK.2 | Webcam | 1080p, 60 fps | sharp and smooth, lots of control via software | €150 |
| OBSBOT Tiny 2 Lite | Webcam with pan head | 4K | follows you automatically, gesture control | €160 to €200 |
| Logitech MX Brio | Webcam | 4K | large webcam sensor, good in low light | €180 to €230 |
| Insta360 Link 2 | Webcam with gimbal | 4K | AI tracking, gesture control, portrait mode | €180 to €230 |
| Sony ZV-1 II | Compact camera | 4K | 1-inch sensor, built-in wide-angle zoom | €600 to €700 |
| Canon EOS R50 V | Mirrorless, APS-C | 4K | built for video, affordable entry into the cinematic look | €600 body only |
| Sony ZV-E10 II | Mirrorless, APS-C | 4K | huge lens selection, usable as a 4K webcam via USB | €850 body only |
Prices are approximate values from price comparisons and retailer offers, approximate and subject to change. They change constantly, check with a retailer before buying.
Which camera would I buy?
If you sit alone or with a co-host at your desk and want to start quickly, take the Logitech MX Brio or the Insta360 Link 2. You plug it in, switch on the light and you are done. If you seriously want to build your podcast on YouTube and the picture should stand out, a mirrorless camera like the Canon EOS R50 V or the Sony ZV-E10 II with a fast lens is worth it. That is more money and a bit more learning, but exactly this difference stands out in the feed.
Which microphone for a video podcast?
For a video podcast in a home studio, a dynamic microphone on a boom arm is the best choice. Dynamic microphones mainly pick up your voice and hardly any of the room, which is why they sound good even in rooms that are not quite perfect. Whether USB or XLR depends on how many people you want to record and how much you want to spend. Which microphones we specifically recommend after more than 6,300 episodes is in the article The right podcast microphone.
USB or XLR?
You plug a USB microphone directly into the computer, which is simple and affordable. For one person that is perfectly fine, and you will find an overview of the best USB models in the article on the mobile video podcast setup. An XLR microphone always needs an audio interface or a podcast mixer. In return you can record several microphones at the same time, each on its own track, and swap out individual parts later. For interviews with two or more people in the same room, XLR is therefore the standard. Models like the Rode PodMic USB or the Shure MV7+ have both connections and grow with you.
And lavalier microphones?
Wireless lavalier microphones like the DJI Mic 3 or the Rode Wireless PRO are the alternative when no microphone should be visible in the shot or you move around while speaking. The sound is good but not as full as with a microphone directly in front of your mouth, and clothing noise can interfere. For classic conversations at a table I would therefore stick with the microphone on a boom arm.
| Microphone | Type | Connection | Strengths | Price approx. |
|---|---|---|---|---|
| Rode PodMic | dynamic | XLR | solid classic, unbeatable price | €100 |
| Rode Procaster | dynamic | XLR | broadcast sound, very insensitive to the room | €170 to €200 |
| Rode PodMic USB | dynamic | USB-C and XLR | sound adjustable via app, grows with you | €180 |
| Shure MV7+ | dynamic | USB-C and XLR | automatic leveling, noise reduction | €280 to €300 |
| Shure SM7B | dynamic | XLR | the podcast standard, needs a lot of gain | €390 to €460 |
| Shure SM7dB | dynamic | XLR | like the SM7B, with built-in preamp | €520 |
| DJI Mic 3 | Wireless lavalier | receiver on camera, phone or USB | two transmitters, invisible in the shot | €220 to €260 |
| Rode Wireless PRO | Wireless lavalier | receiver on camera, phone or USB | internal recording as backup, timecode | €310 |
Prices are approximate values from price comparisons and retailer offers, approximate and subject to change. They change constantly, check with a retailer before buying.
Audio interface or podcast mixer?
An audio interface connects XLR microphones to your computer and provides the necessary gain. A podcast mixer can do more: it also records without a computer, has faders for every person, buttons for jingles and often a connection for guests via phone or Bluetooth. For one person a small interface is enough, from two people in the room a mixer is worth it.
With microphones like the Shure SM7B, make sure the interface has enough gain. Otherwise the recording sounds quiet and noisy, and you additionally need a preamp.
| Device | Type | XLR inputs | Strengths | Price approx. |
|---|---|---|---|---|
| Focusrite Scarlett Solo (4th gen) | Audio interface | 1 | simple, reliable, the entry point for one person | €100 to €130 |
| Zoom PodTrak P4next | Podcast recorder and interface | 4 | records to a memory card, lots of gain, four headphone outputs | €170 |
| Rode RØDECaster Duo | Podcast mixer | 2 | touchscreen, sound processing, jingles at the push of a button | €360 to €450 |
Prices are approximate values from price comparisons and retailer offers, approximate and subject to change. They change constantly, check with a retailer before buying.
The right light for your video podcast
Light is the cheapest route to a better picture. A good light at an angle in front of you makes more of a mediocre webcam than an expensive camera in a dark room. Never sit with the window behind you, rather to the side of or facing the window.
For a professional picture you work with three lights:
- Key light at an angle in front of you, slightly above eye level, ideally with a softbox for soft light
- Fill light on the other side, weaker, so the shadows do not get too harsh
- Background or rim light behind you that separates you from the background
For starting out, the key light is enough. I would avoid a ring light directly in front of the face, though: it makes the picture flat and reflects in every pair of glasses.
| Light | Type | Strengths | Price approx. |
|---|---|---|---|
| Elgato Key Light Air MK.2 | LED panel | flat, controllable via app, ideal on the desk | €150 |
| Godox SL60IIBi | COB light, Bowens mount | a lot of light for the money, adjustable color temperature | €140 without, €270 with softbox and stand |
| amaran COB 60x S | COB light, Bowens mount | very good color rendering, quiet, controllable via app | €220 to €240 |
Prices are approximate values from price comparisons and retailer offers, approximate and subject to change. They change constantly, check with a retailer before buying.
Headphones, accessories and room
For headphones, closed-back studio headphones like the Beyerdynamic DT 770 PRO for about €125 to €150 have been a safe buy for years. If you do not want to be seen with big headphones in the video, small in-ears work too. The main thing is that you hear yourself and your guests, and none of it leaks from the speakers back into the microphone.
Add a sturdy boom arm so the microphone is close to your mouth without covering your face. And do not underestimate the room. Small rooms with carpet, curtains and full shelves sound much better than large, empty rooms with bare walls. By the way, what the picture looks like in the background is also part of the setup. A few plants, a shelf or a colored light on the wall make more of a difference than the next expensive camera.
Software for recording and editing
For recordings with remote guests, Riverside is my recommendation. Each person is recorded locally on their own device, so the quality stays high even with a bad internet connection. More on that and the alternatives is in the article on remote podcast interviews.
For editing, free programs like CapCut or DaVinci Resolve are enough to start with. Descript is handy if you prefer editing in the text rather than in the audio track. Professionals mostly work with Adobe Premiere Pro or Final Cut Pro. And if you do not want to deal with editing at all, my team and I take care of it for you. Why editing yourself rarely pays off for business owners is in the article Editing your own podcast.
Three video podcast setups by budget
So you do not have to piece it together yourself, here are three setups that fit together. All prices are approximate values for one person.
| Starter | Advanced | Pro | |
|---|---|---|---|
| Camera | your smartphone | Logitech MX Brio | Sony ZV-E10 II with a fast lens |
| Microphone | Rode PodMic USB | Shure MV7+ | Shure SM7B |
| Audio | directly via USB | directly via USB | Zoom PodTrak P4next |
| Light | window to the side | Elgato Key Light Air MK.2 | Godox SL60IIBi with softbox, plus fill light |
| Headphones | existing in-ears | Beyerdynamic DT 770 PRO | Beyerdynamic DT 770 PRO |
| Software | Riverside, CapCut | Riverside, DaVinci Resolve | Riverside, Premiere Pro or Final Cut Pro |
| Total approx. | €200 plus boom arm | €650 to €750 | €2,000 and up |
Prices are approximate values approximate, without boom arm, stands and software subscriptions.
Bonus
Your smartphone as a 4K camera, without any webcam
Before you spend €200 on a webcam, try what you already have in your pocket. You can connect your phone to your laptop with a USB cable and use it instead of the built-in laptop camera, with the front camera or the considerably better rear camera. Current iPhones and many Android phones film in 4K, which is the quality you want for YouTube, without spending a cent on a webcam. Riverside, Zoom, OBS and every other program then recognize it like a normal webcam.
With an iPhone on a Mac this works via Continuity Camera, by cable or even wirelessly. On many Android phones from Android 14, you plug in the cable, tap the USB notification and choose “Webcam”. That works on Windows and on a Mac. For older phones or an iPhone on a Windows PC, an app like Camo helps. Put the phone on a small tripod at eye level, and you have a picture that makes every laptop camera look old.
And if you have two phones, you even have two angles. In Riverside you can bring a second phone into your recording via the app as a “Second Camera”, for example for a side angle or a wide shot of both of you. Alternatively, you simply join as a guest with the second phone via the invite link, but then mute the microphone on that phone. That way you have two cameras to switch between in the edit without having spent a cent on a camera.
Conclusion on video podcast equipment
A good video podcast setup for the home studio stands on three legs: audio, light and camera, in exactly that order. Start with a dynamic microphone and a good light, and feel free to use your smartphone as the camera to begin with. The webcam or mirrorless camera comes later, when you notice your podcast should grow on YouTube.
How to build reach on YouTube with your recordings afterwards is in the article Growing your podcast’s reach on YouTube.
Frequently asked questions about video podcast equipment
You get a simple video podcast setup with smartphone, USB microphone and window light for about €200. With a 4K webcam, a better microphone and a light you are at about €650 to €750. A pro setup with mirrorless camera, XLR microphone and several lights costs about €2,000 and up.
For most podcasts at a desk, a 4K webcam like the Logitech MX Brio or the Insta360 Link 2 is the best choice because it simply works. If you want the cinematic look with a soft background, take a mirrorless camera like the Canon EOS R50 V or the Sony ZV-E10 II.
No, for one person a good USB microphone is enough. XLR is worth it if you record several people in the same room or want to expand your setup later. Microphones like the Shure MV7+ or the Rode PodMic USB have both connections.
Yes, an iPhone can be used as a camera on a Mac, and many Android phones from Android 14 directly as a webcam via USB cable. Current iPhones film in 4K, and the rear camera delivers a considerably better picture than any built-in laptop camera.